I found this project online. It caught my attention and I was really skeptical about how easy it would be. I tried it once and it worked beautifully! Here's how it works! :)
What you need:
1. Glass project piece (I used a small canning jar)
2. Glass Etching Cream
3. Vinyl (size depends on the project, usually sold as 12" x 24" pieces
4. Transfer Tape (size depends on project, also sold as 12"x 24" pieces
5. Cricut machine
6. Cricut Mat
7. Cricut Sweetheart cartridge (or whichever cartridge has the design you want)
8. Cricut tools (to get the small pieces out of detailed images
9. Paint brush
10. Water to rinse project off
First measure your project working space. I chose a jar whose side width measured 2 1/2" by 3" tall.
Adhere your vinyl onto your mat. I cut my vinyl with a 1/4" border. We will not use the cut out for the project, but instead, we are using the background cut out. You will see what I mean as we continue.
I cut my image at 2 1/2 inches tall. This image is from the Sweetheart Cricut cartridge. My cutting pressure was on low on my Cricut Expression machine, this way it doesn't cut all the way through and I can remove the vinyl and it will be ready to stick on my glass. If you cut all the way through, it's okay too. You just have to remove the backing from the vinyl to adhere it to the glass project.
Below you see my cut out.

Once you have cut your vinyl, remove the image leaving only the outline. It is blue where I have removed the vinyl.

Cut your transfer tape the same size as your vinyl square or slightly larger. The transfer tape I used looks a lot like masking tape! It's very thin and sticky! The backing has grids on it for cutting guide lines. Once you have cut your transfer paper, remove the backing. The backing again has the grid lines on it. Place the transfer tape on top of your image and smooth out with the stick they provide (if you didn't get a stick, just use your hands, press hard.) Once you have applied your transfer tape, lift the transfer tape with the attached vinyl off the mat, leaving the blue backing on the mat (you will throw the blue backing away. Also, with colored vinyl the backing may be white).

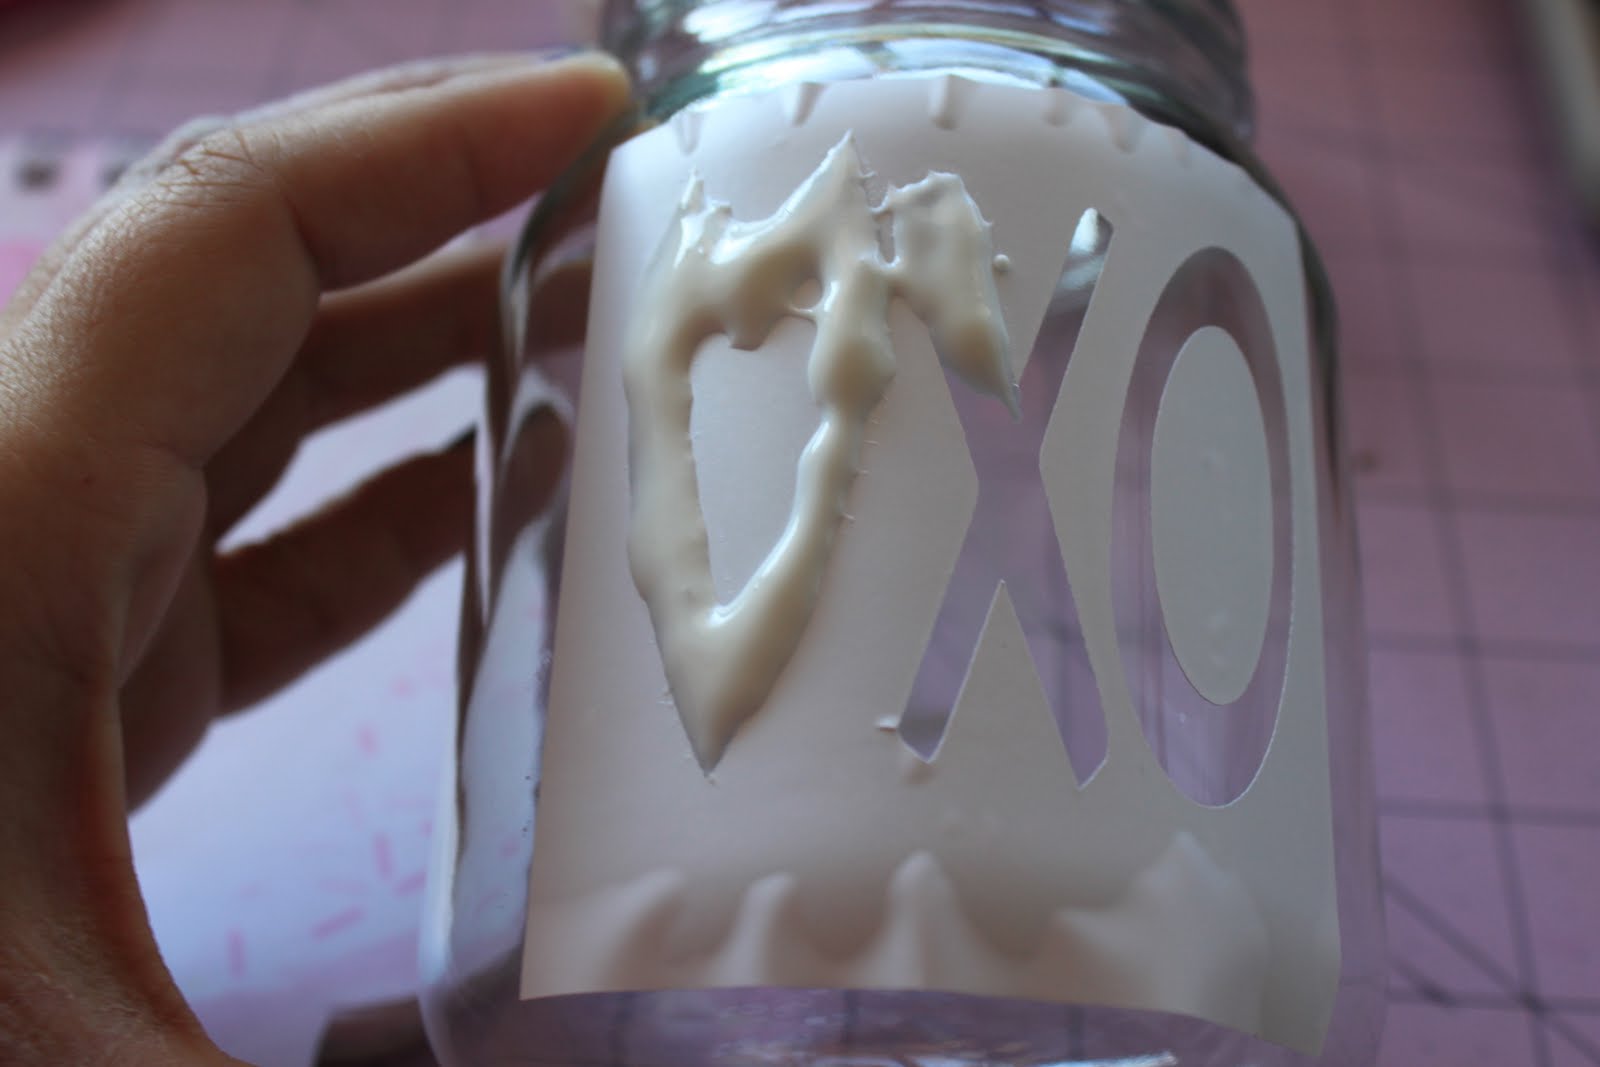
Adhere the vinyl to the glass project. Smooth out the transfer tape as well as you can. Anywhere the vinyl isn't attached, the etching cream will get to. It is permanent so make sure you are very careful!

Apply the glass etching cream. The brand I bought is called "Armour Etch" and can be found at Michaels or Joanns. A small bottle (3 oz.) was about 12.99 but you can use your 40% off coupon! :)
Be very generous with the etching cream. The better you cover your image, the better it comes out. As you can see I painted it on very thick so that I would get the best results. Be careful to only put the cream where you want the glass to be etched.
The packaging says to leave the etching cream on the project for 5 minutes. I left it on a little longer just to make sure it worked right.
Once 5 minutes is up, rinse off your project under running water. use the brush to get all of the etching cream off and out of the groves. Dry with a towel.
Remove the vinyl from your project to see the final results!

I put a piece of black paper behind the image so you could see it better, horrible picture i know, but you get the idea!

Thanks for joining me in this glass etching adventure! Don't forget to Create like Crazy!!!
No comments:
Post a Comment